Ask an OT | Correcting grip, making handwriting fun, and leftie tips


Ask an OT is a NEW monthly series answering questions that we receive from educators, parents and OTs, like you! This month we’re addressing if you should correct a three year old’s grip, how to make writing fun for frustrated four year olds with simple and memorable tactile tricks, and have an amazing primer on everything you need to know to help a young leftie.
Have your own questions for our OTs? Send us a message on Facebook or Instagram!
Watch the full Ask an OT episode here and continue reading below for more advice on this month's topics.
#1 Should I keep correcting a grip at age three or let them keep trying their own way?
Three to three and a half years old is the perfect time teach grip. While it is developmentally appropriate for a two year old to hold their crayon with a fisted grip, at three years old it is best to lay the foundation so that they learn the correct grip from the get go because we all know how difficult it is to correct a habit.
How can you help a 3 year old?
The solution is simple: “little tools for little hands” and by this I mean only use broken crayons! One inch broken crayons are the best solution because children can not hold it any other way. Due to the small size of the broken crayon it is nearly impossible for a child to hold it with their entire fist or all fingers.
You may be wondering is there a certain type of crayon I recommend breaking?
I recommend breaking all types crayons: regular crayons, chubby crayons and triangle crayons. You can even offer children fancier crayons like rock crayons, stackable crayons and bulb crayons. Learning Without Tears offers a fun flip crayon that a child can use too that works on in hand manipulation. Learning Without Tears even has a really catchy song called “Pick Up a Crayon” that you can play as children are coloring with their little broken crayons.
#2 My four year old gets frustrated and gives up when practicing writing her letters. What can I do to make it fun?
This is a perfect question for the best child friendly company as we preach our company’s name: “Learning WITHOUT Tears” and by that I mean we offer fun, multisensory, hands on, developmentally appropriate methods so that the child does not get frustrated and give up.
It is important to think out of the box to make writing letters fun rather than asking a 4 year old to participate in boring handwriting drills or confusing worksheets. Tactile play is a fun and powerful learning opportunity and there plenty of easy ways to practice around the house. For example, writing letters on the steamy shower door, writing with sidewalk chalk and painting letters with water on the driveway.
Roll A Dough is a manipulative created by Learning Without Tears that really makes letter formation fun and is designed to increase hand strengthening as an added bonus. The children roll out the dough and then shape it into letters. The fun does not stop there and you can even try adding shaving cream, flour, salt or fake snow into the blue tray and have the child trace on top of the laminated ABC cards using their pointer finger.
Another fun exercise is using your arms and body to shape letters. You can have extra fun using these gross motor activities by turning off the lights and using a flash light to write letters and numbers on the door. Throw in silly voices and it sure to be memorable and fun.
Learning Without Tears offers many more multisensory activities perfect for 4 year old including: Wood Pieces, Stamp and See Screen, and Wet Dry Try on the slate chalkboard.
Remember, 10-15 minutes of letter practice is all a child needs to learn how to write their letters a day!
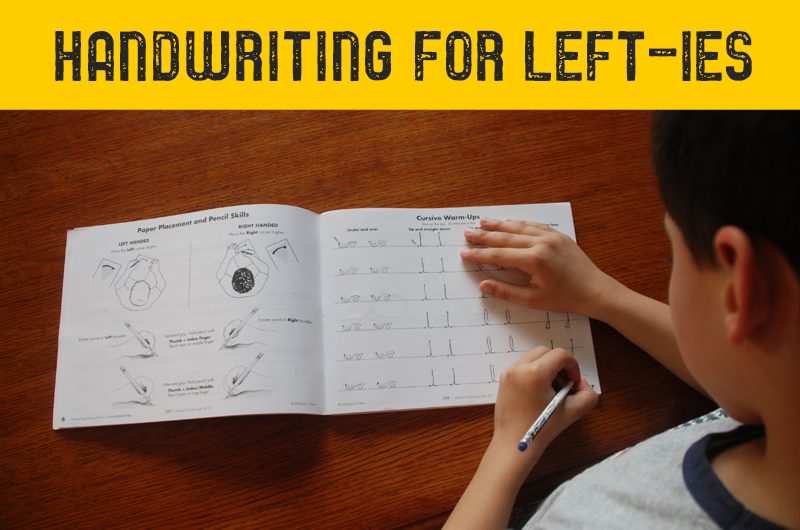
#3 Any suggestions for left handed printers?
We live in a right handed world, right? But lefties cannot be left behind! Ten percent of the population are left handed so here are some awesome tips to help lefties succeed.
We encourage lefties to hold a writing tool the same way a rightie does, however lefties can hold their pencil about 1 to 1.5 inches from the tip to allow the child to see what they are writing. A sticker is a great visual reminder to help a leftie know where to grip their pencil.
When writing words and sentences, a leftie should tilt their paper in the opposite direction that a right handed person tilts their paper. For a leftie, the left corner should be higher to accommodate how the leftie’s wrist naturally arcs downward. A great visual to help a leftie to know which way to tilt their paper is to draw an arrow at the bottom left corner and tell the child to point the arrow to their belly button.
It is also important to not foster a left handed hooked grip which can develop when a child hooks their wrist in order to see what they need to copy. An easy solution is to photocopy the worksheet and place it to the right of the child so that the leftie can see what they have to copy without hooking their wrist. Learning Without Tears workbooks are all left and right hand friendly plus you can make your own worksheets at A+ Worksheet Maker Lite online that ask children to copy words under the example thus eliminating the potential to foster a left handed hooked grip.
When teaching letter formation, letters are generally formed with the same sequence for righties and lefties with the exception that lefties may cross letters with a horizontal stroke from right to left. For example when writing the letters A G H I J T f t it may feel more natural for a leftie to pull the horizontal stroke into their writing hand rather than push away.
Lastly, some additional tips include seating a leftie on the left side of a shared desk so that they do not play bumper elbows with their neighbor, flipping a spiral notebook over so that their hand does not have to rest on the uncomfortable spiral, using mechanical pencils to decrease the lead smearing when writing, placing the computer mouse on the left side and offering left handed scissors. I hope these tips are helpful to those in the “left-handed club.”
For more ways to support left-handed learners, check out this blog post from my fellow presenter, Denise Donica.